
2023/2 Version
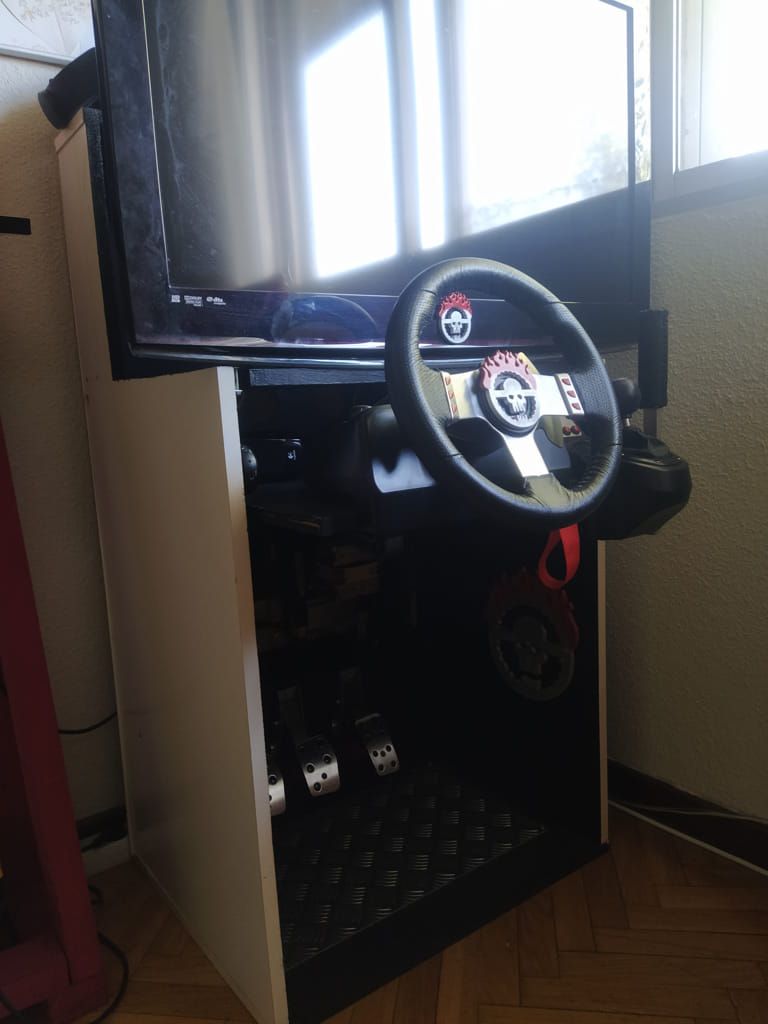
It turned out that there is such thing that FOV. Upon setting it up it turned out that the screen for the rig is way too small. Luckily there was a 32″ Samsung TV collecting dust in on of the bedrooms, so…
2023 Version
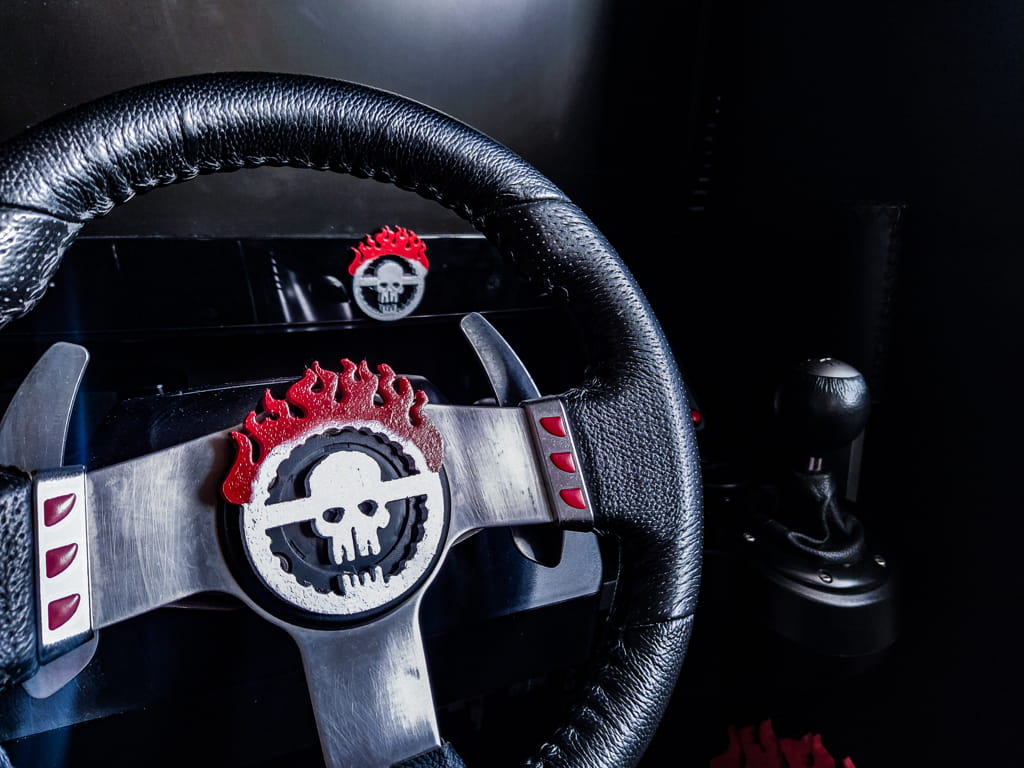
Finally the rig has got a step closer to achieve its final form. Sure DIY projects can never be finished only abandoned but the rig is visually very close to that was envisioned. The War boy logos are 3D printed then simply painted with chrome paint and red.

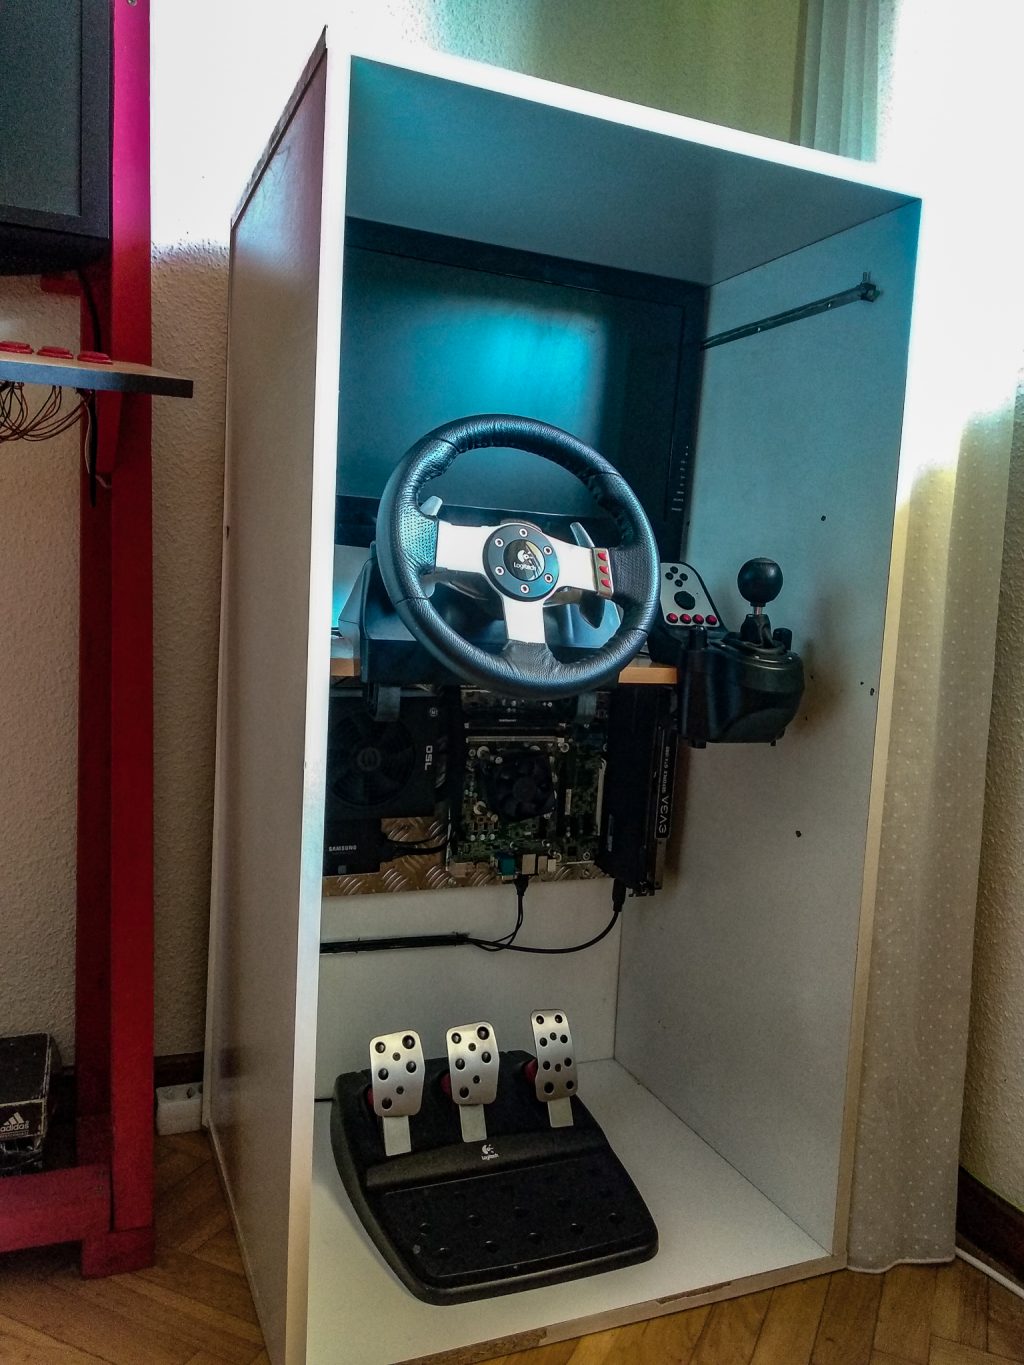
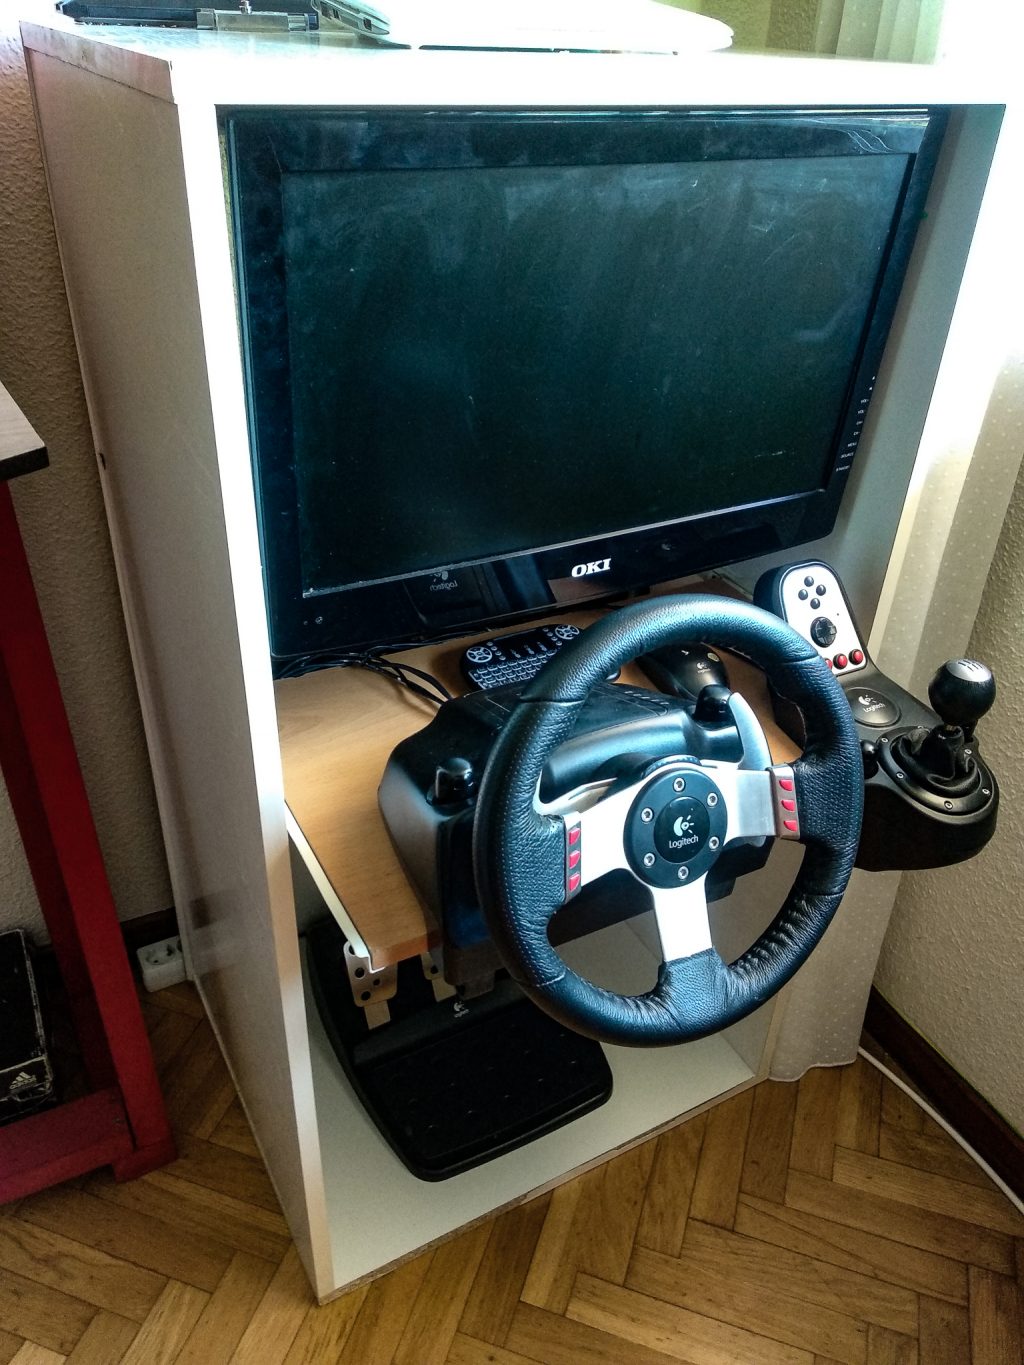
Retracted position. The monitor and the wheel are in the back of the box.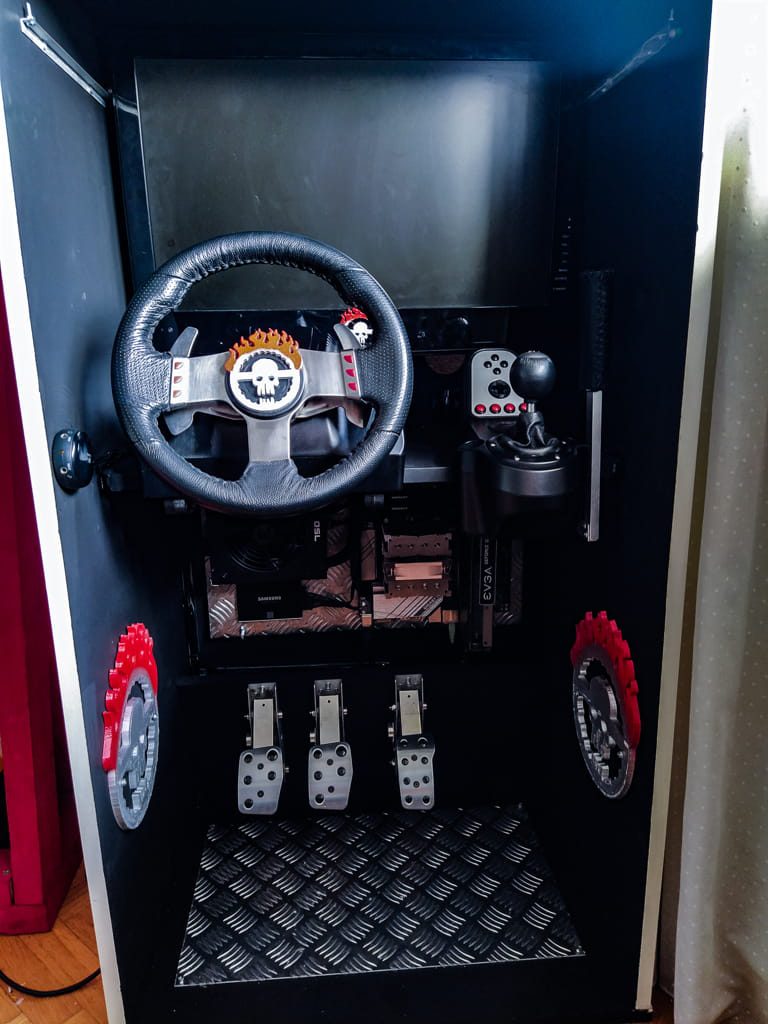
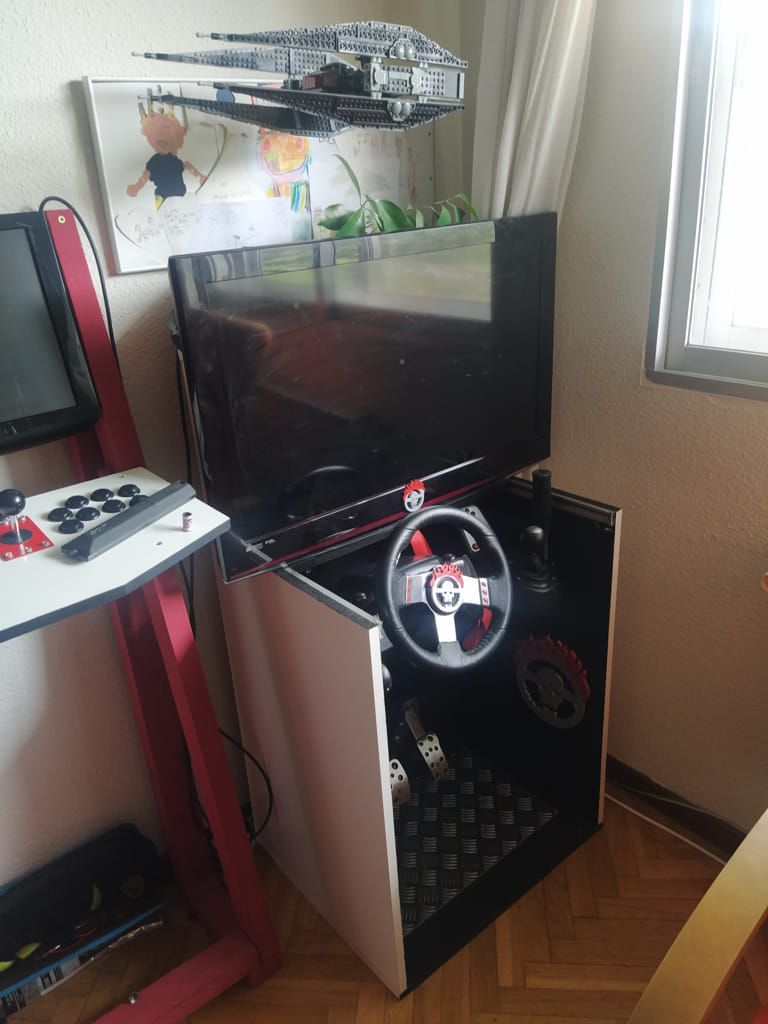
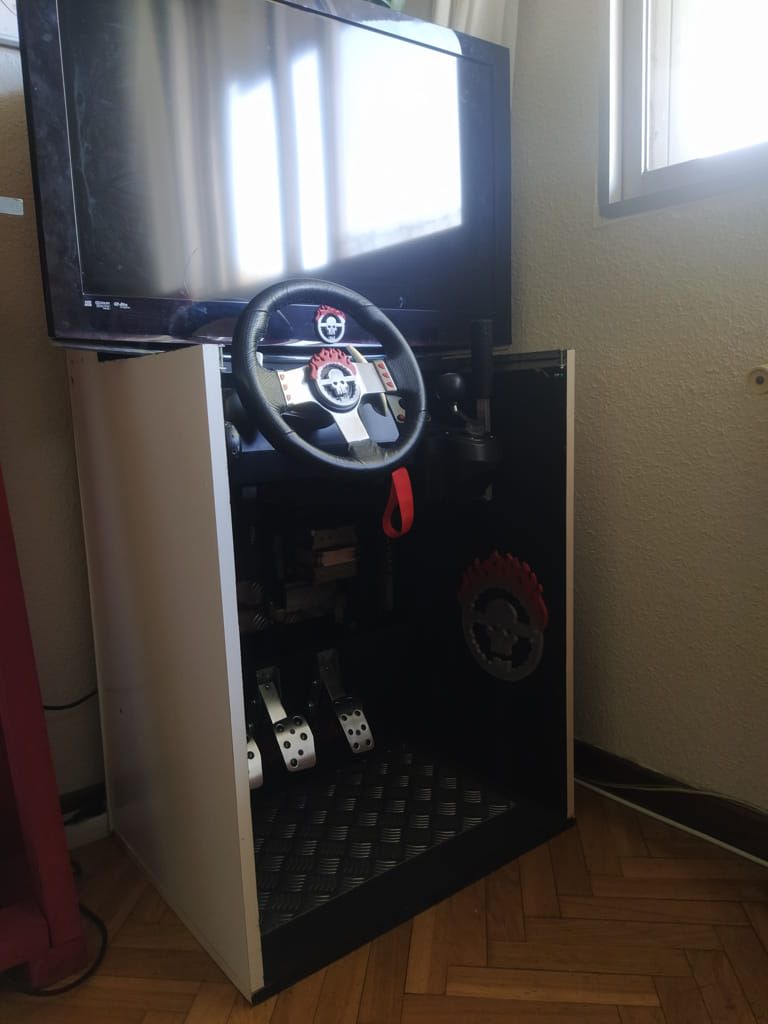
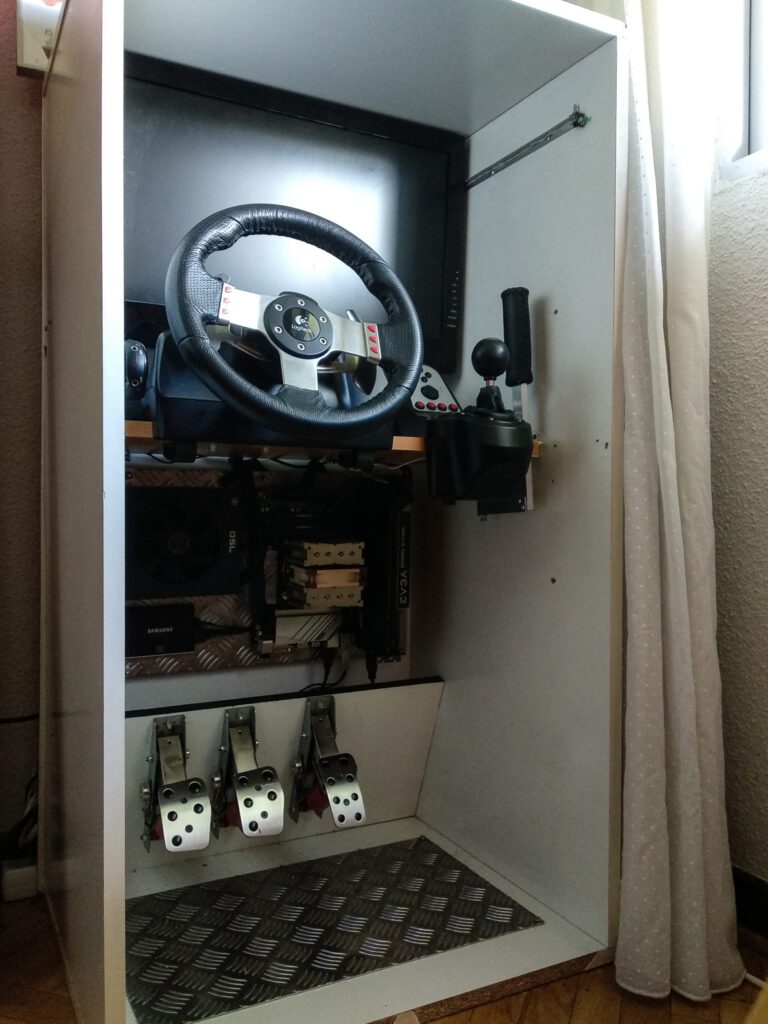
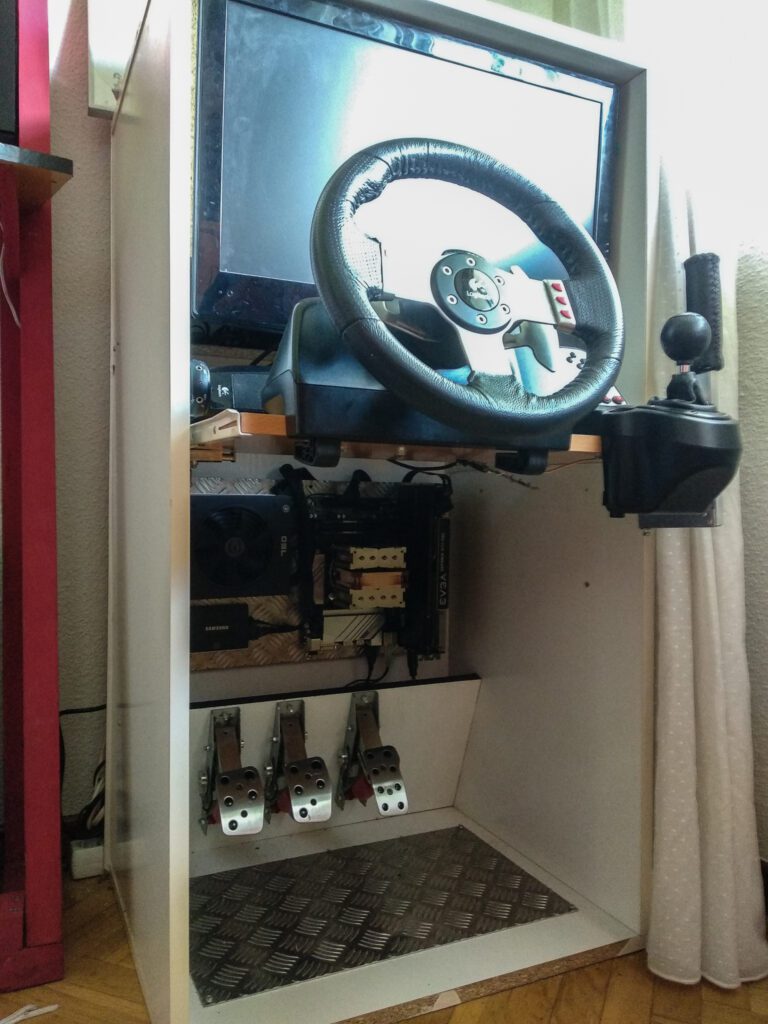
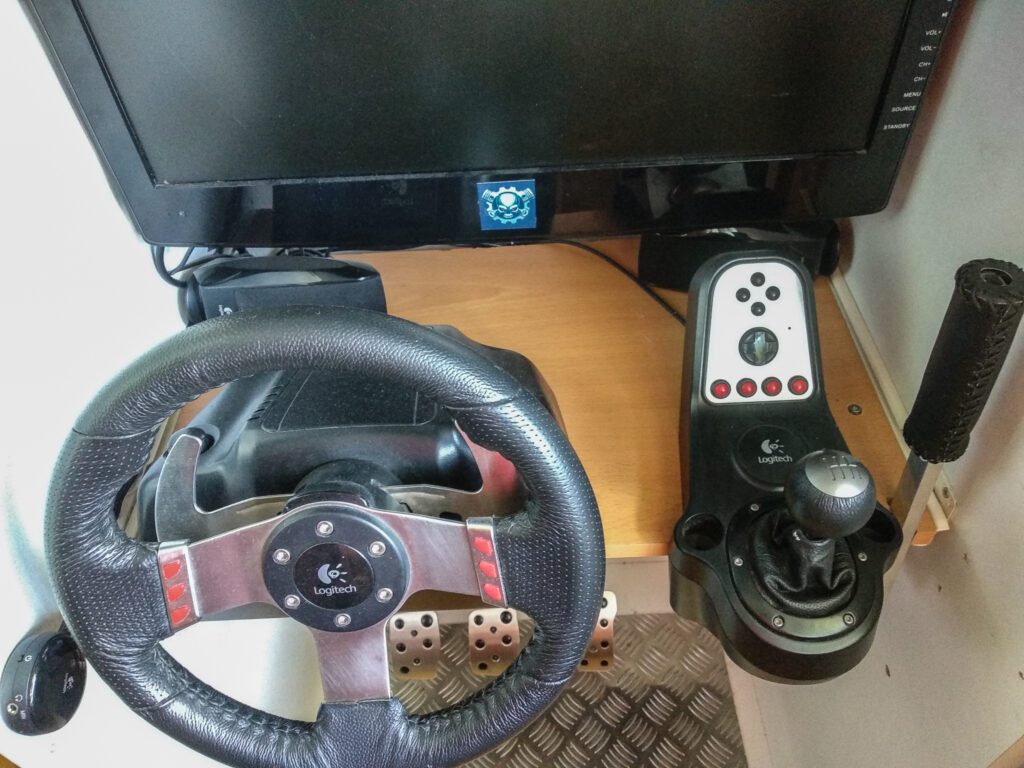
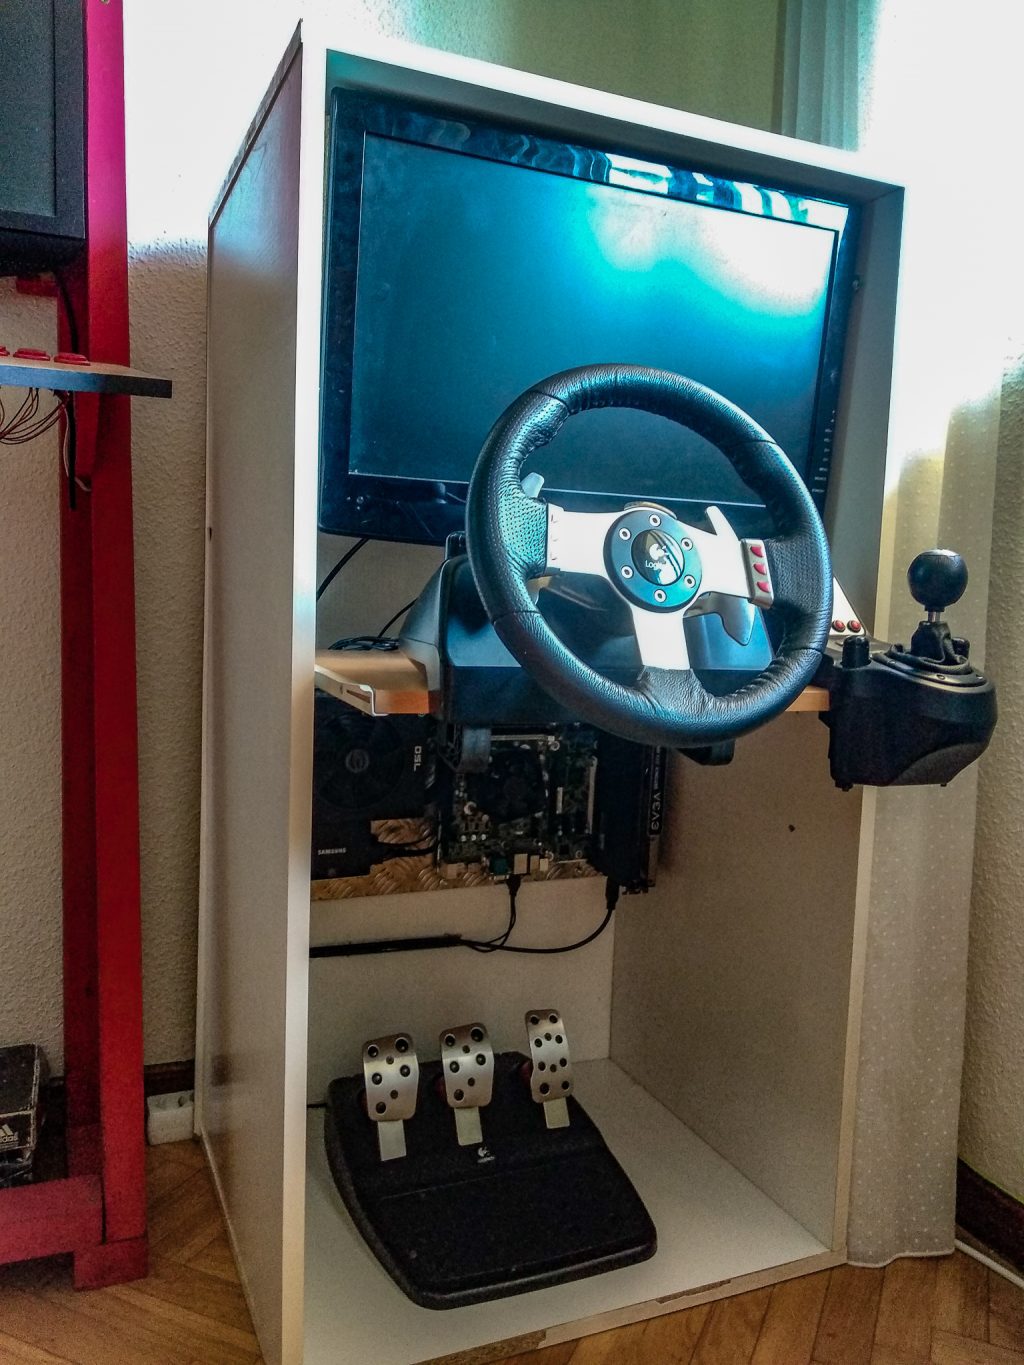
The wheel and the monitor are extracted from the back and the shelf is locked in its furthest position.
The handbrake is part of the shelf and works with a simple micro switch connected to a keyboard PCB.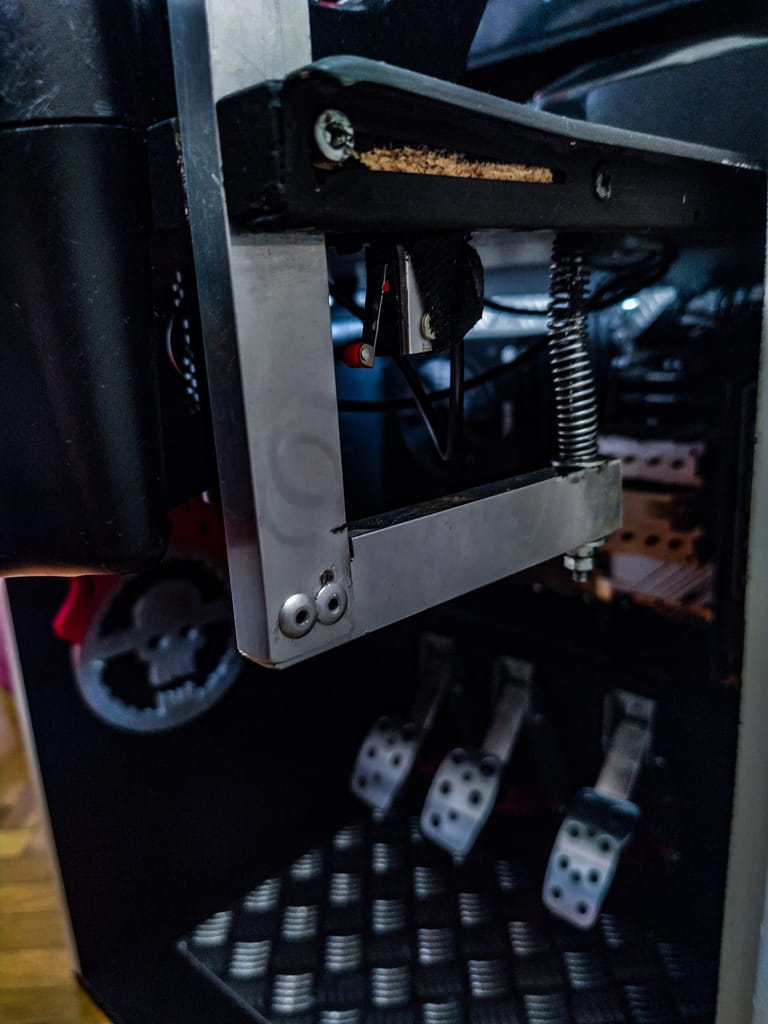
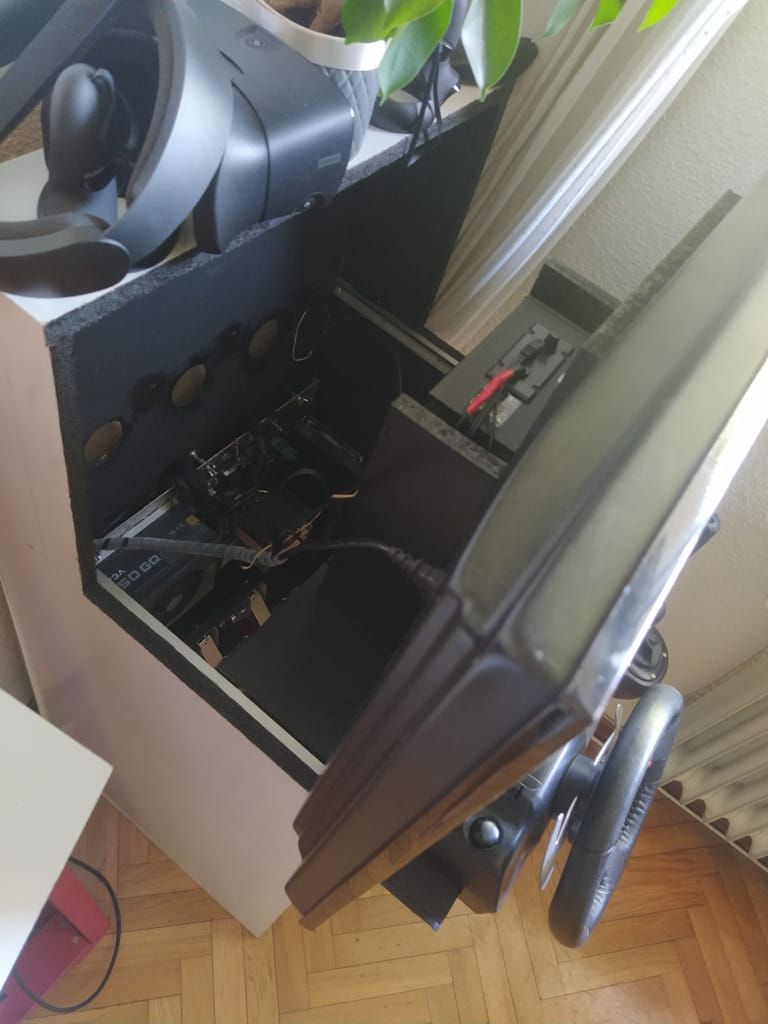
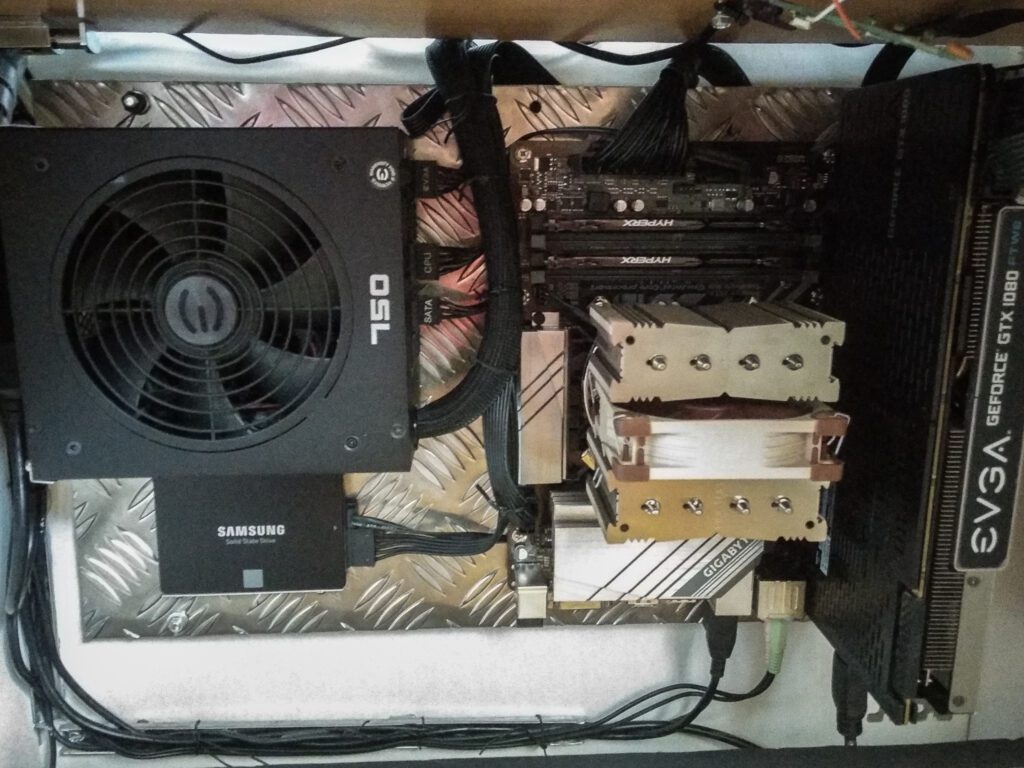
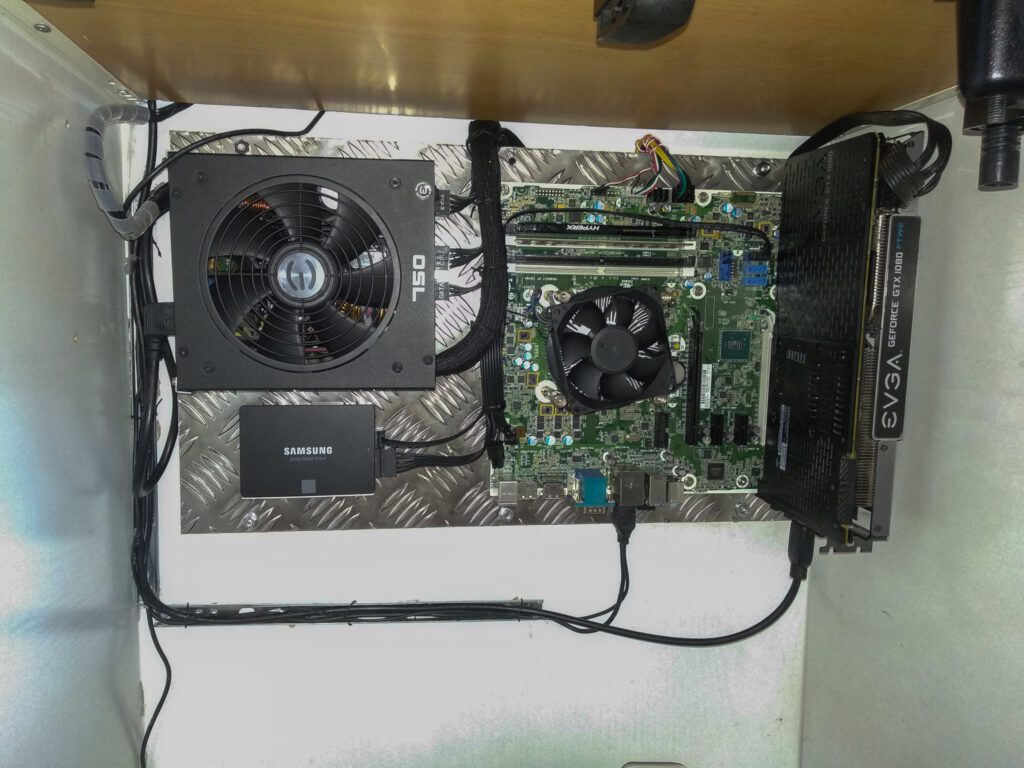
Closeup of the engine bay. The shelf lock is also visible in the upper left corner.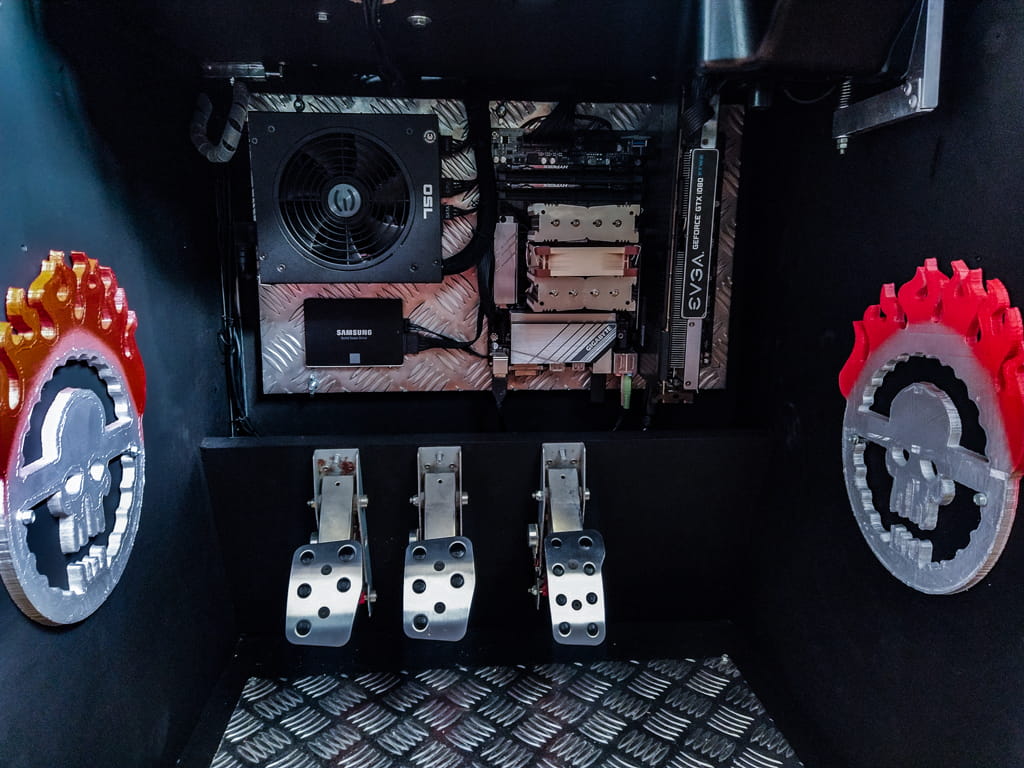
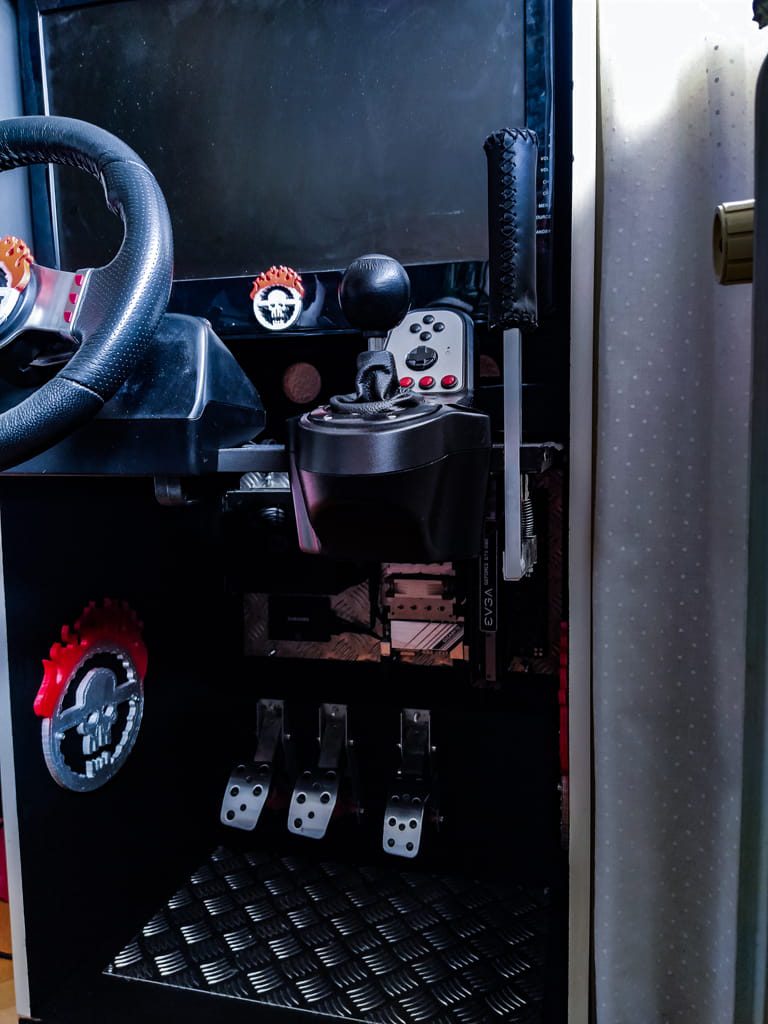
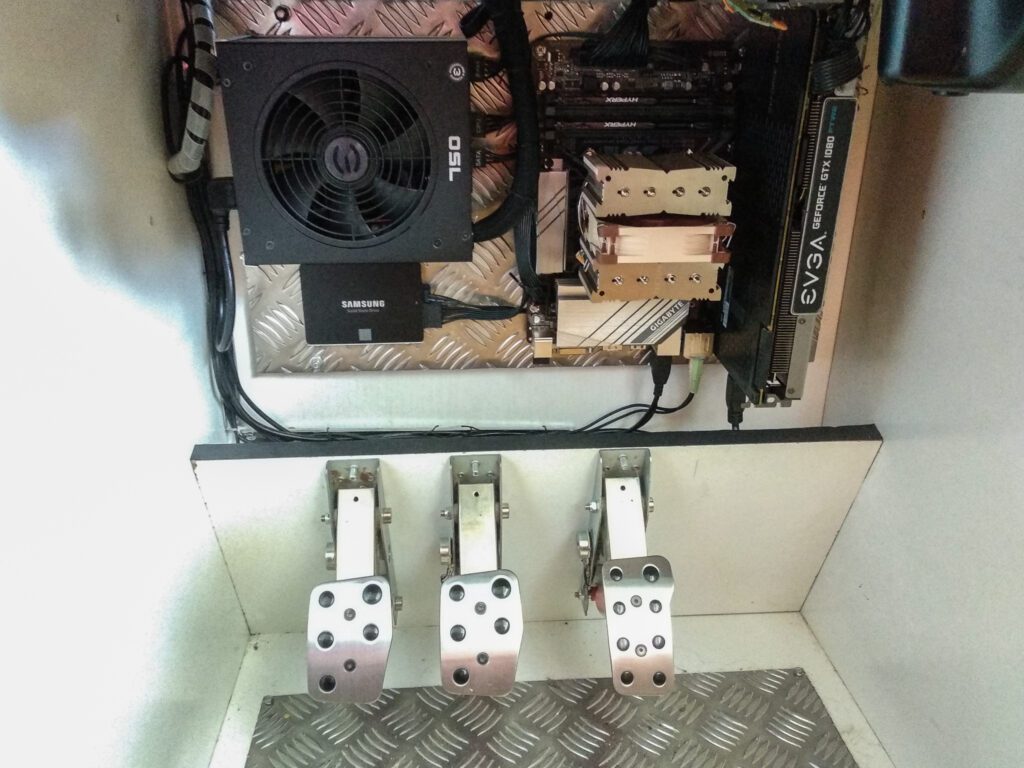
Closeup from the right.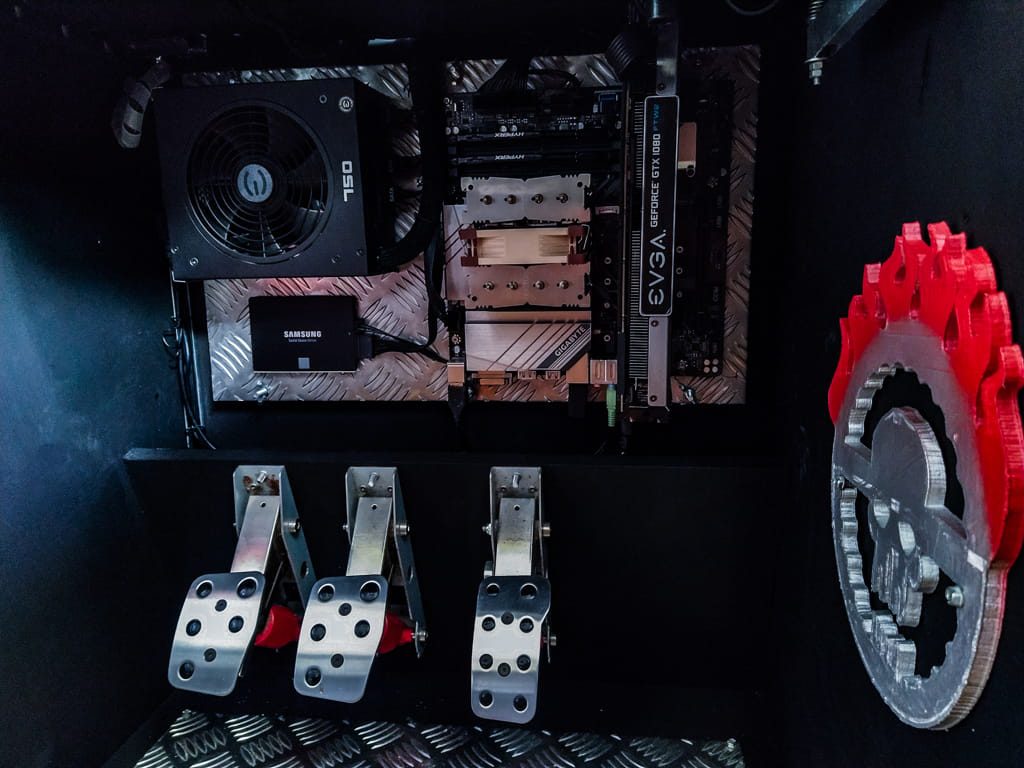
FOV calculator:
https://andyf.me/fovcalc.html
2021 Version
Box:
23″ x 19″ x 44″ / 60cm x 48.5cm x 112cm
Rig:
- Gigabyte z390M Ultra Durable
- i5 – 9600k
- 16 GB Ram HyperX
- 500 GB HDD Samsung EVO 860
- Noctua NH-D9L
- Logitech G27
- PSU EVGA 750 GQ
- GPU EVGA FTW2 GTX 1080
- Custom made handbrake from a keyboard
- Logitech s220 2.1 Speaker system
Version 2020
Retracted:
From above
Box:
23″ x 19″ x 44″ / 60cm x 48.5cm x 112cm
Rig:
- HP EliteDesk 800 G2 SFF
- i5 – 6500
- 16 GB Ram HyperX
- 500 GB HDD Samsung EVO 860
- Logitech G27
- PSU EVGA 750 GQ
- GPU EVGA FTW2 GTX 1080
Custom mods:
Backplate
Removing the motherboard from the case requires a bit of fiddling but it’s a relatively easy task. Our problems starts when we realize that the case is an organic part of the whole system and the motherboard was not meant to be used in any other way. The CPU fan does not attach to a backplate on the other side of the motherboard as it is normally the case but to the case itself.
Hence when we remove the motherboard from the case we end up no bracket to attach the heatsink anymore. This situation would ruin many DIY project instantly but luckily there are LGA 115x backplates ready to be shipped to any address we specify.
Error messages
As the HP EliteDesk 800 G2 SFF has some problems when removed from the original case a couple of pins has to be shorted to trick the bios thinking the motherboard is still in the original case. It could have been much easier just to turn these things off in the BIOS or not to have sensors for this stuff the first place. After all decades went by without the BIOS knowing if a USB or audio port is really connected without serious complications. For some reason HP choose to have these thing right now and without any options to disable them on the software side.
So taking the HP EliteDesk 800 G2 SFF out from its cozy case will results the following errors:
- 100 – Front Audio Not Connected
- USB 3.0 not connected
- 41A – Front USB 1 Not Connected
- 41A – Front USB 2 Not Connected
- 901 – Chassis fan not connected
- 90E – Power supply fan not detected
The solution of each of those errors require some shorting:
How to disable front audio error on HP EliteDesk 800 G2 SFF:
There are tips on the web about how to short various other mobos to completely disable the sound or just simply join the back and front audio together. Unfortunately, shorting won’t do anything on the HP EliteDesk 800 G2 SFF. 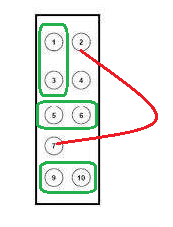
The red lines show the two pins (2 and 7) that needs to be shorted in order to completely disable the audio.
The greens show how each channel should be connected in order to keep the audio enabled yet the front and back audio connected.
1 -3 Microphone
5-6 Audio Left
9-10 Audio Right
We have to use a 100 ohm resistor to make the the HP EliteDesk 800 G2 SFF BIOS believing the front audio panel is connected. 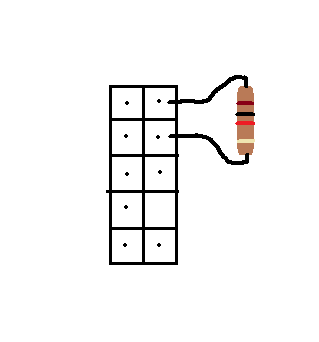
How to disable front USB 3.0 error on HP EliteDesk 800 G2 SFF:
Luckily this is pretty standard stuff and HP hasn’t messed with this feature.
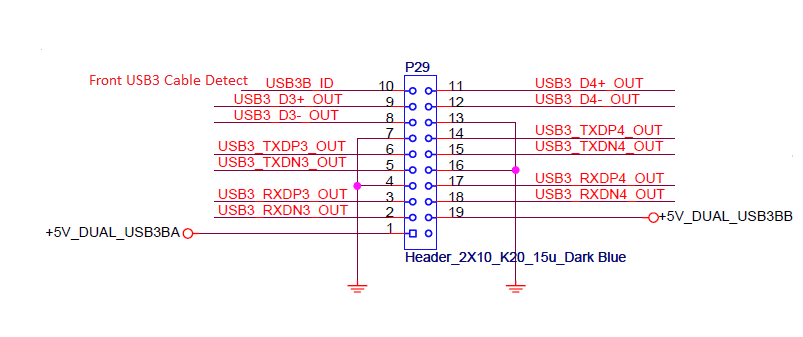
Pin 10 is the front USB 3.0 cable detect. The Front IO cable grounds this pin, so the system knows the cable is installed.
If pin 10 is connected to ground, meaning it is jumpered to pin 4, 7, 13, or 16, the system will think the cable is installed and there will not be a POST error during boot. The pins are very thin and fragile, so it may need an uncommon jumper to do this.
If uncommon jumpers aren’t available then soldering wires to the pins is also an option. A less barbaric or permanent method would be using a standard female pin and press it tighter together with pliers. The connectors may need to be taken out from the plastic housing to achieve this if we haven’t got a bunch of brand new pins at hand.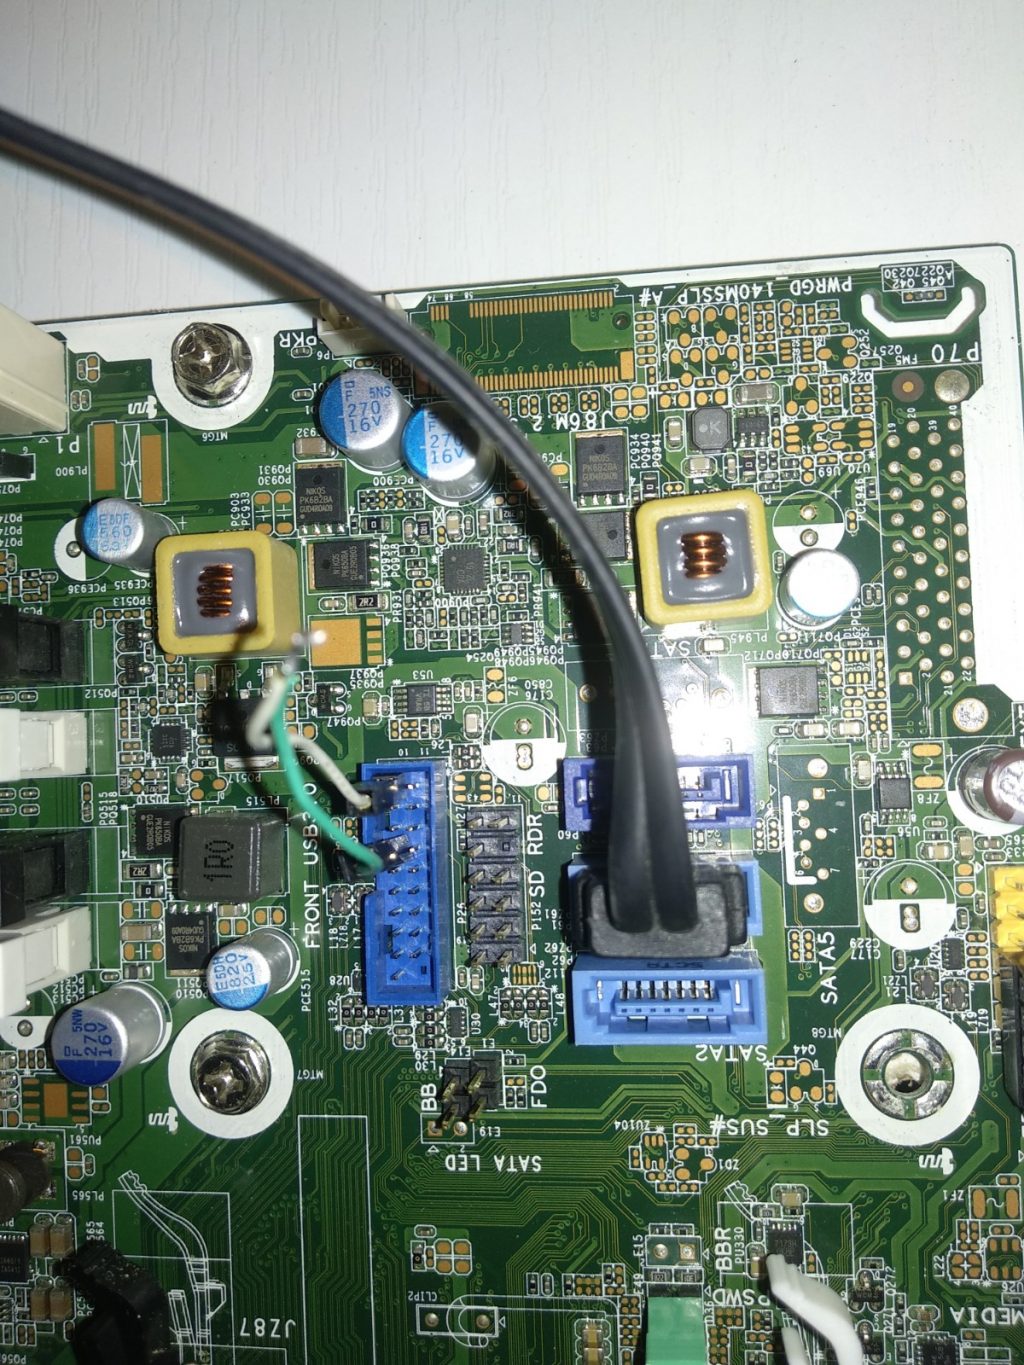
A more permanent solution is to solder a wire to the pins on the back of the board.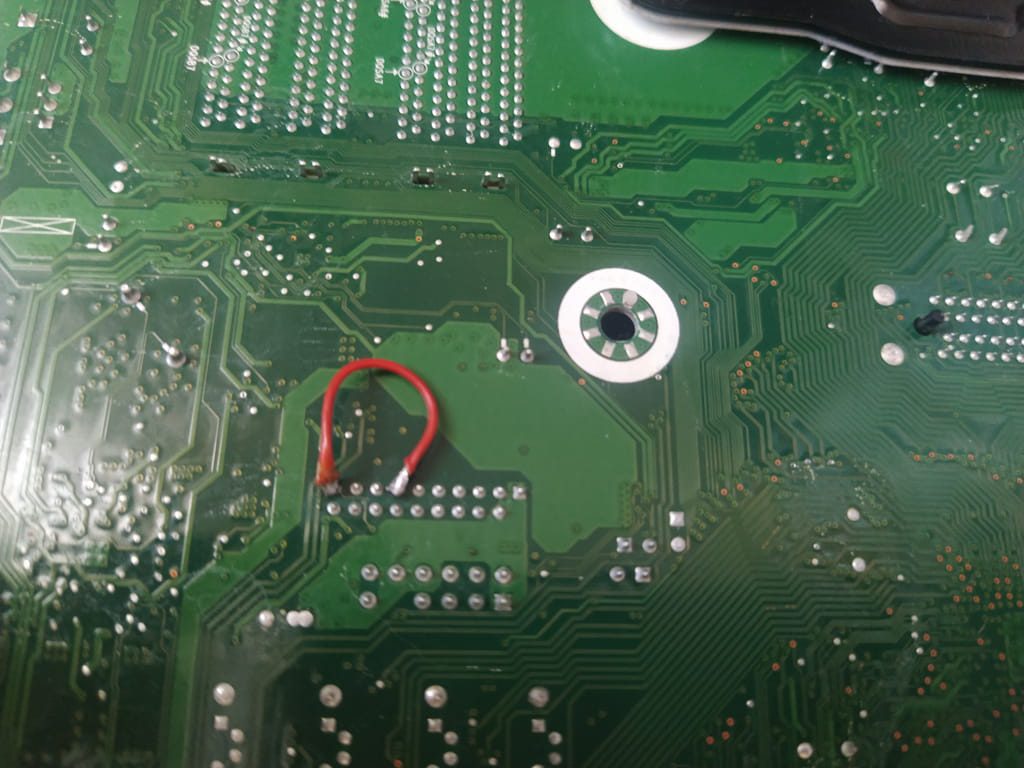
How to disable front USB error on HP EliteDesk 800 G2 SFF:
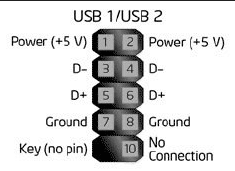
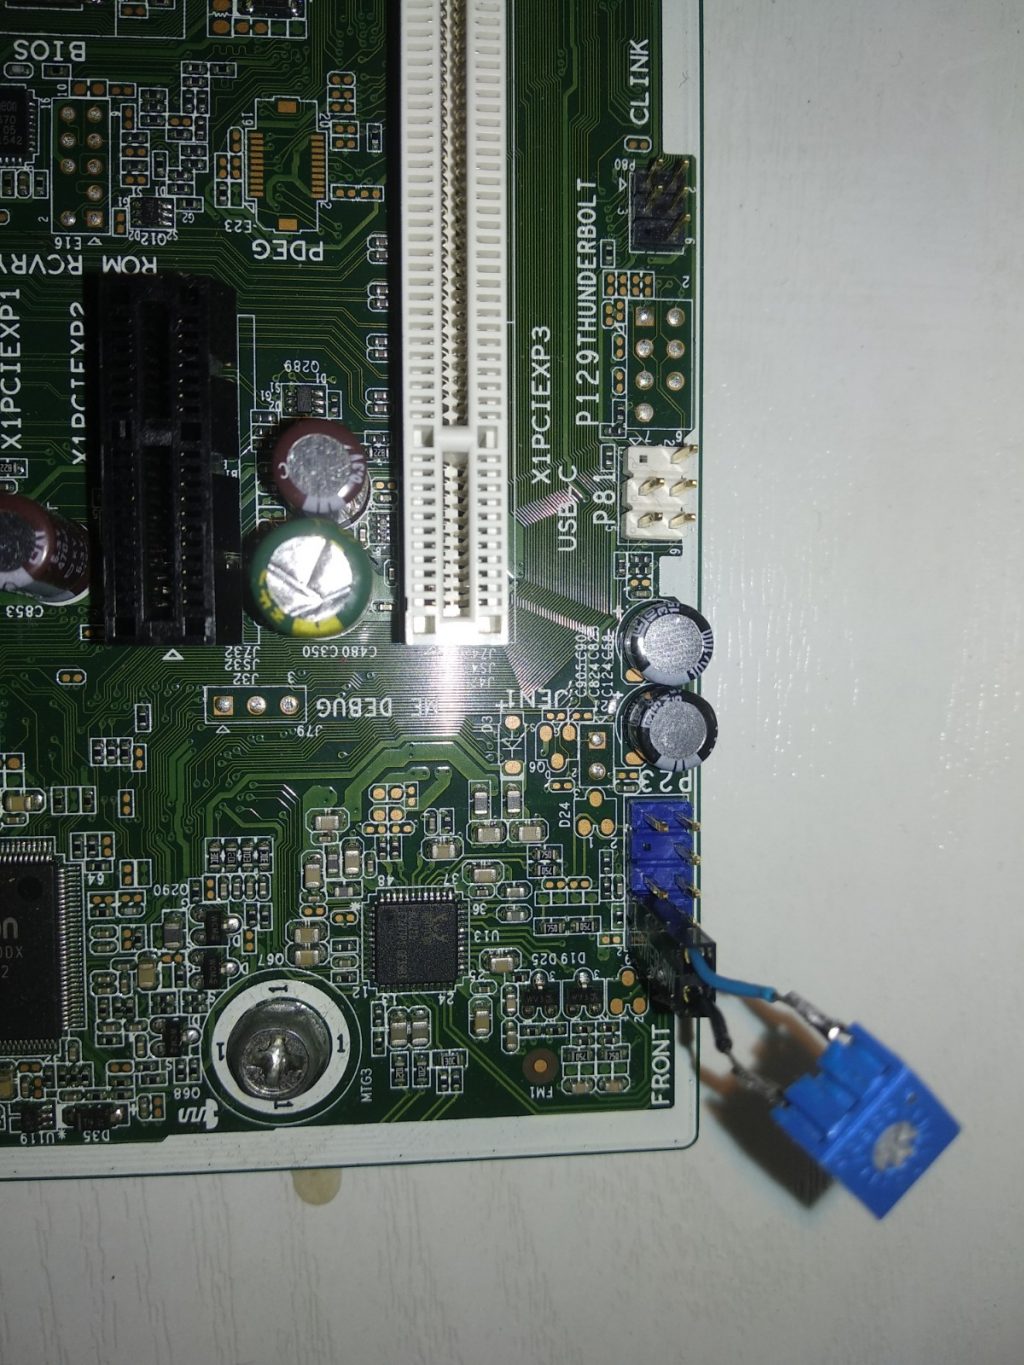
On a normal USB 1/ USB 2 connector generally the number 10 shorted to the ground tells the BIOS about a USB interface connected to the motherboard. Unfortunately, the USB connector of the HP EliteDesk 800 G2 SFF is not really a normal USB connector. Although a normal female USB connector can be connected to it without problem as the pinouts are the same on the motherboard the number 10 pin will be missing along with the number 9.
HP added an extra pin to the motherboard connector on the 11th place and moved the 10th pin to the 12th place. The chassis Front USB 2 cable when connected shorts the pin 7 to pin 11 and the pin 8 to pin 12. Disabling the missing front USB error on the HP EliteDesk 800 G2 SFF requires only to short pin 8 to pin 12.
It’s worth to note, that error message won’t disappear if we plug generic USB connector onto these pins because the necessary pins won’t be shorted nor here nor on the USB3.0 connector.
If we want to completely get rid of the error message 41A, we also have to short the pins 7 and 10 on the usb3.0 connector. If fail to do so, by simply plugging in a generic usb3.0 connector, we will be presented with the error message. The solution is to short the pins by soldering wires to them on the back of the board as seen above. This way we can plug the connectors to them without problem and indicate to the bios that they are in use.
I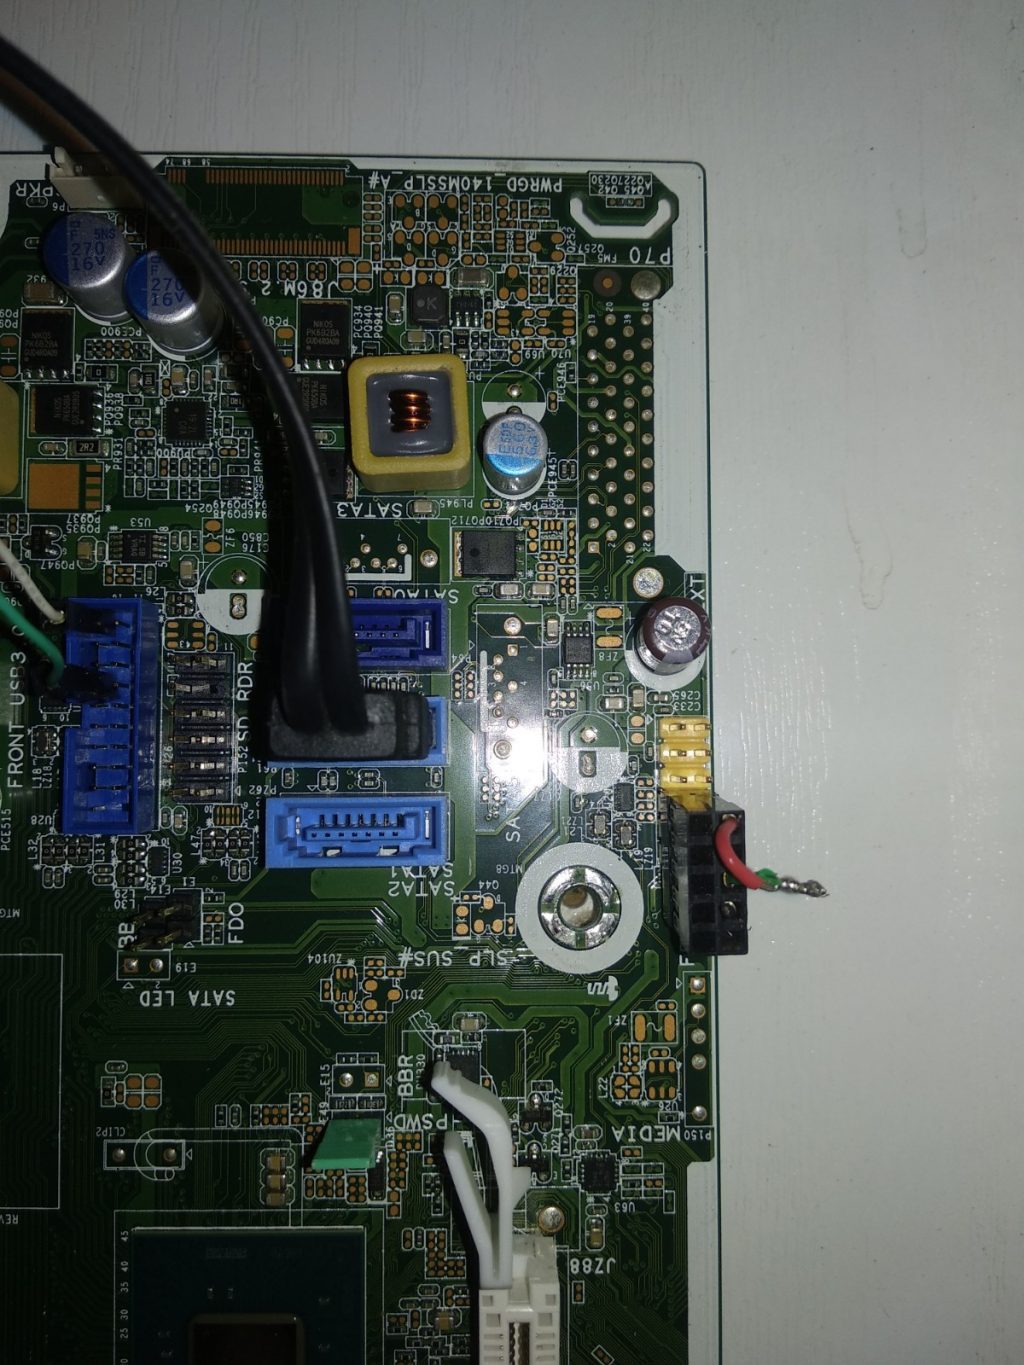
Again we can do this with a bit of soldering on the back of the plate too.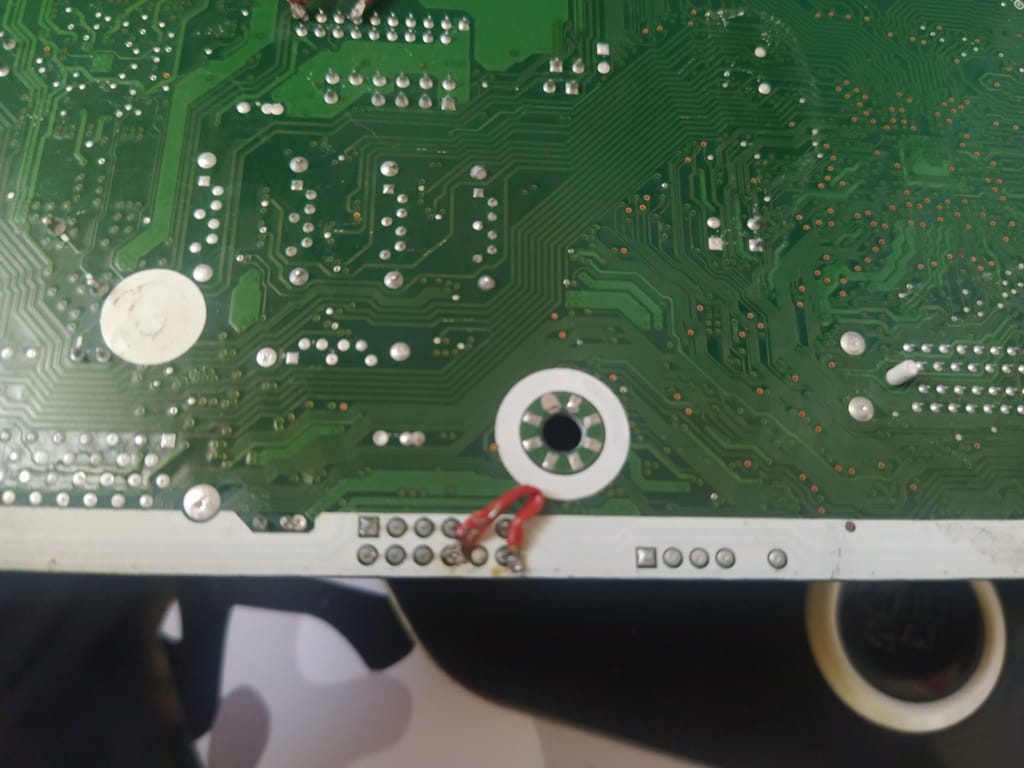
How to disable 901 Chassis fan not connected error on HP EliteDesk 800 G2 SFF
It seems that the same motherboard is used in different HP products and cases. Although the HP EliteDesk 800 G2 SFF has never had a Chassis fan other models that are housed in a tower case were lucky to have one. It seems that no hard wire hacking is necessary to disable this error message as a simple BIOS update will do the trick.
Simply update to the latest BIOS downloading the updater file from HP’s websites and the error message will be gone once the new BIOS is properly installed.
How to disable 90E Power supply fan not detected error
Keep in mind that this error only occur when the PSU fan is damaged or as in this case removed from the system and replaced with a custom PSU. The presence of the fan is detected by the Pin 2 on the white 6 pin connector:
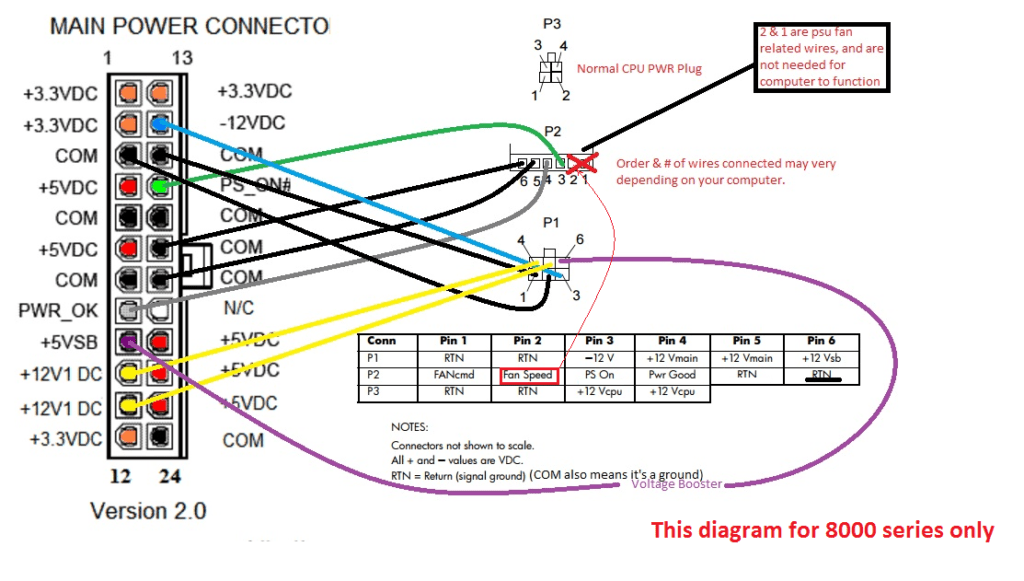
To trick the bios into thinking that the fan is still connected we have to connect the pin 2 of the white 6 pin connector to the CPU fan sense pin which is in the case of HP EliteDesk 800 G2 is a grey cable instead of green or yellow.

This can be done by simply plugging a wire right next to the cables in the connector where they can sit snugly. Or get the soldering iron again and run a wire from one place to the other on the back of the motherboard.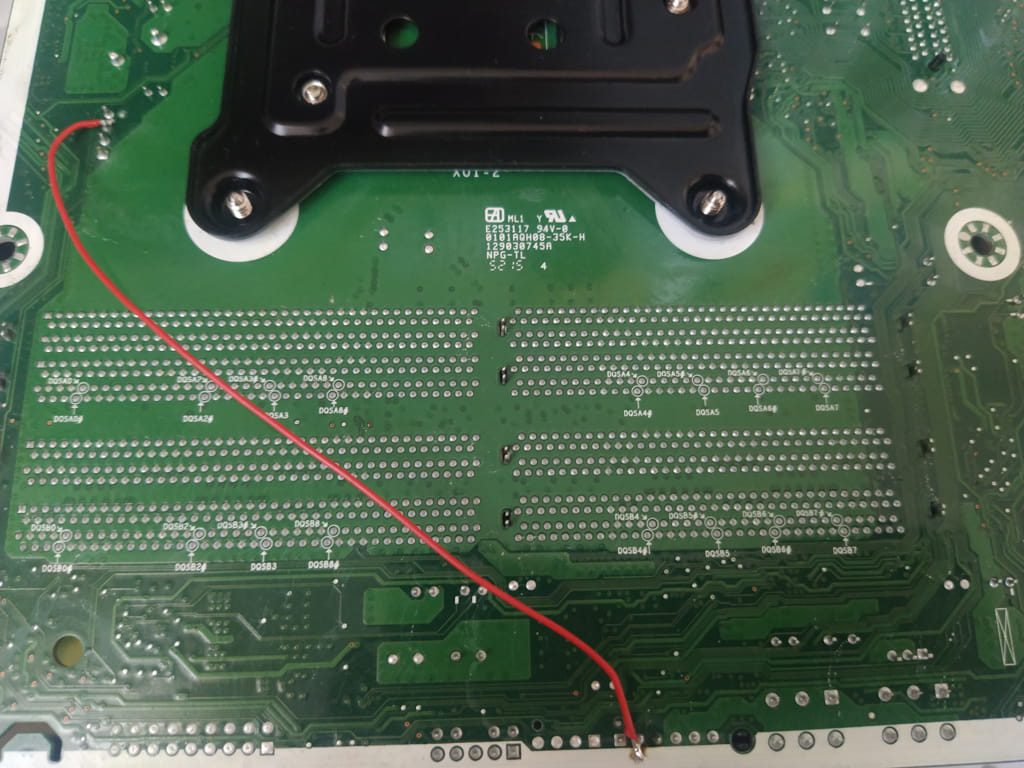
Motherboard PB/LED (P5) header pinout
(9) n/c (7)Pwr Sw (5)Pwr Sw (3)HDD LED- (1)HDD LED+
(10) jmp (8) jmp (6) blank (4) Power LED- (2) Power LED+
HP EliteDesk 800 G2 z240 ATX 24 pin to 6 pin pinout
HP EliteDesk 800 G2 or as known as z240 has a special pinout that is very rare to find online but not impossible: HP Z240 PSU Main Power 24 Pin to 6 Pin Adapter Cable 30cm
Unfortunately many vendors on cheaper places like ebay, aliexpress or even amazon sell the old style converter that even though it specified that it’s compatible with the 800 G2 it is not. It’s very frustrating waiting for a month for something that doesn’t do what it supposed to do. Luckily with a bit of fiddling we can rewire the old style adapter to fit our needs.
The P1 connectors are wired correctly so we don’t have to touch them. The thinner P2 connector will require to be rewired as shown on the image:
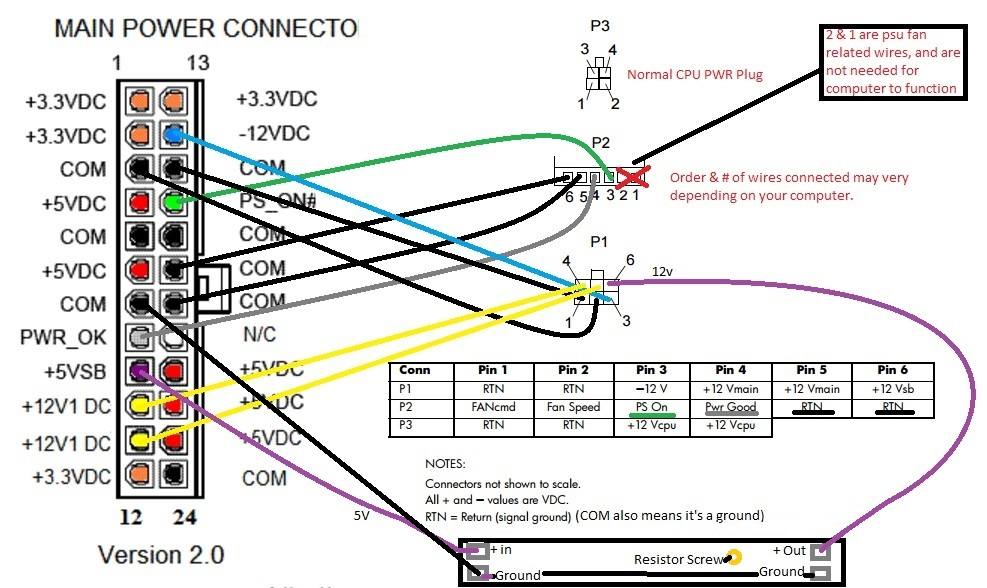
While removing the cables from the P2 connector is a piece of cake and only require a something pointy to nudge the connector out, the 24 connector will test our patience and skills if we haven’t got the proper tools. It’s highly recommended to invest in a pin removal tool at the same time we place an order for an atx adapter.